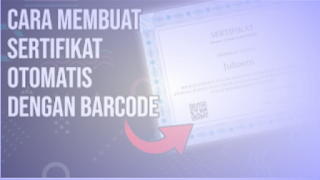
How To Make Certificates Equipped With Barcodes Automatically
During the Covid 19 pandemic in our beloved country, we as teachers or lecturers and even all professions, have been busy with various online or web binary seminar activities on a local, national and international scale.
With the existence of the activities above, of course also not being applied, apart from knowledge, the relationship obtained from these activities is the existence of a certificate or eSertificate. Talking about certificates, maybe we as an executive committee are often busy with administrative activities because the participants are hundreds or even thousands especially in making certificates.
Therefore, to facilitate the making of certificates, of course we must first create a system so that we do not create data manually, but we can automatically create certificates that can be equipped with certificate numbers and barcode or QR Code automatically as well.
In creating a barcode or QR Code certificate automatically, one can take advantage of existing technology, one of which is by using the Google form, which makes it easy so that participants themselves fill out the form, after that the eSertificate will automatically be sent to each participant's email ... easy right ???
If you want to try it please follow the following guidelines:
1. Please prepare a certificate template, in this example I created a certificate template using Powerpoint for example can be downloaded HERE
2. Login on google drive HERE
3. If you have logged in to Google Drive, make a Folder first example "Certificate Training", then enter the PPT template that was downloaded above into the folder.
4. After the template is uploaded, please first change the PPT file to "Google Slide" by opening the PPT Template file, consider the following picture
5. after the file opens please give the naming in ppt <<Number>>, << Full Name >>, <<Date>> and << QR Code >> then save it by clicking the "File" menu and then selecting "Save As Google Slide "like the following example:
6. after completing as above, then create a google form in the same folder and then make the variable "Email", "Full Name", "Date of Creation" other variables such as numbers and barcodes will be created automatically on the "Spreed Sheet" or excelnya , as follows
7. After you create the form, please fill in first to ensure the database will function automatically before the link is sent to the seminar.
8. If you have filled in the form, please open the spreadsheet or excel file to organize and link Google slides templates and excel files. Like the following picture
9. The next step is to name the column F with the name "Number" and Column G with the name "QR Code" then enter the following formula in column F2: = ARRAYFORMULA (IF (A2: A1623 <> ""; ROW (A2 : A1000) -1; ""))
And the following formula in column G2: = ARRAYFORMULA (IF (A2: A1000 <> ""; "https://api.qrserver.com/v1/create-qr-code/?size=600x600&data=" & (ENCODEURL (E2 : E1000)); ""))
10. If you have finished up to point 9 above, please click "Add-on" select "autocrat" if autocrat is not installed, install it first by clicking "Add-on" select "Get Add-on" then the application "autocrat "And install until it's finished, if it's already installed please close it again and stay in the Excel file. Add-on-> autocrat-> click Lounch / Open then wait for a while until a new window opens then click "New Job" at the bottom then fill in Job Name: Certificate click Next, then select Form Drive to connect the Google Silde template, after that click Next until a new window pops up and then adjust the data, especially for the QR Code "Standard" replaced with "Image", consider the following picture
11. When you reach point 10, continue by clicking "NEXT" then File Name: Certificate _ << Full Name >> _ <<Number>>, Type: PDF, then click NEXT until Step 8. Share docs & send emails, choose Share Doc ?; YES, then email To: << Email Address >>, consider the following picture:
12. If you have reached point 11 above continue by clicking NEXT and select YES on the Run on form trigger then confirm YES Then save, at this stage we have successfully connected the Google Slide certificate template with the data base in the spredsheet or excel.
If you have reached point 12 that means you have succeeded in making it and please test it by sending data through the form that was created then check your email within 2 to 5 minutes then the certificate will automatically enter the email to friends. And if still confused can see the following video:
For friends who want to test the form that I have created, please click HERE
Thus this guide, may be useful for friends and thank you, see you in our next article. wassalam


